Data
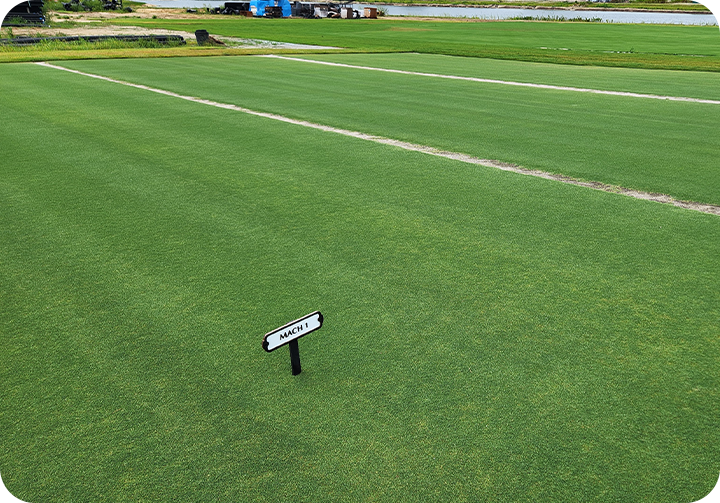
Mach 1® Ultradwarf Bermuda
Specs, Research, Maintenance Guidelines

Genus
Bermudagrass hybrid cultivar, (Cynodon dactylonxCynodon transvaalensis). It is taxonomically identified as Cynodonxmagennis ii.

Stable Cultivar
No mutations. No off-types noted after nearly two decades of research.

Color
Medium green (N135A) to dark green (N134A).

Sprigs
Currently harvested for sprigs, limited sod availability.

No seedheads
Ever.

Uses
Golf course greens, golf tees, croquet lawns, grass tennis courts, lawn bowling, and lawn bowling greens.
Comparative Research Stats
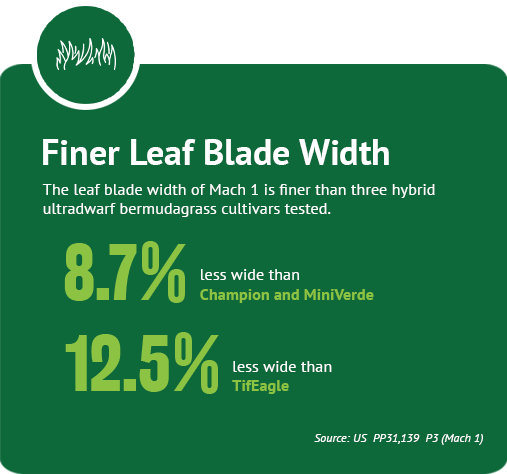
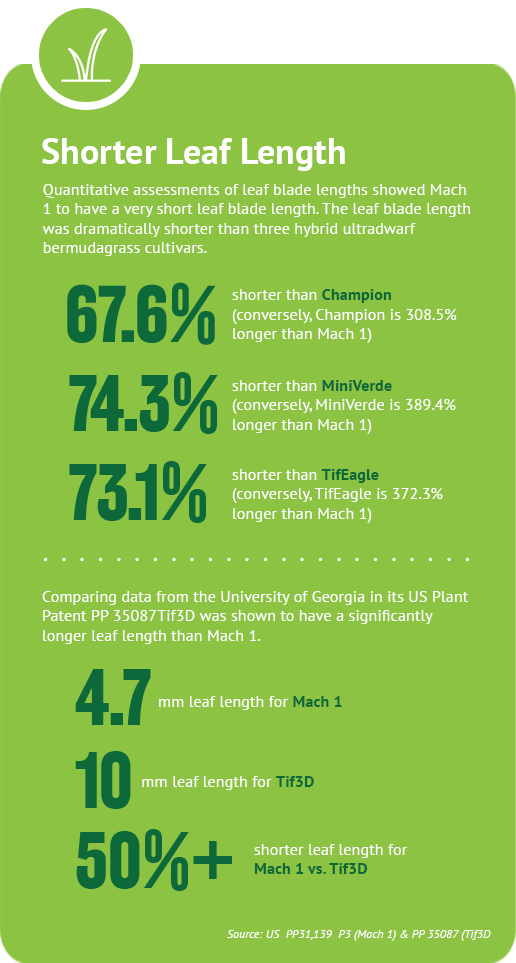
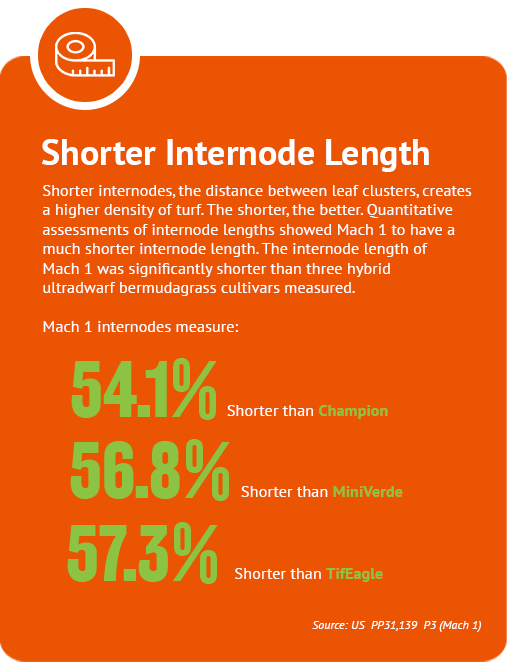
Why does Mach 1 produce faster, tighter, and smoother putting surfaces than other ultradwarfs? Mach 1 has a thinner leaf blade, shorter leaf length, shorter internode and larger stolons than other ultradwarfs tested.


Specific Herbicide Tolerances
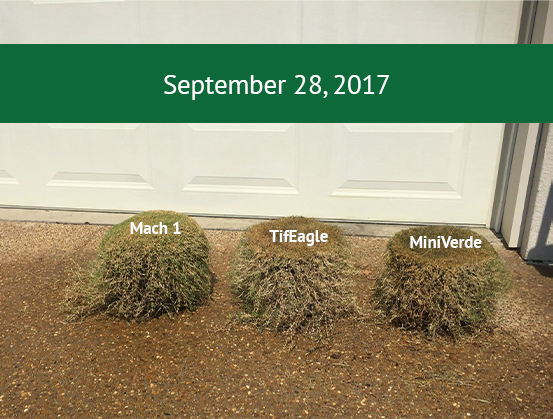
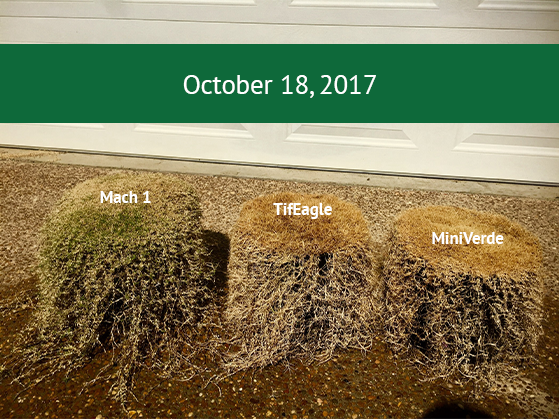
Mach 1 has shown better tolerance to light rates of Roundup than other ultradwarfs in greenhouse situations.
(Roundup applied at 2% rate)
PGRs
Mach 1 reacts well to low PGR rates with growth regulators such as Primo. See maintenance instructions for further details.

Mach 1 Maintenance Guidelines
Excerpted from The Lingle System of Ultradwarf Management by Rodney Lingle, CGCS

Test Green Management
Primo 3 to 4 ounces of product weekly during the summer. Less Primo in the spring and fall – 1 to 2 ounces weekly. Mach 1 responds favorably to Primo and this is very important to producing a smooth, fast putting surface.
Year-round except for during topdressing. I adjusted the brushing depth from .080 Clearances during the summer to .100 Clearances during the winter months. If the green started to look a little thin, I would skip brushing for a week or so, until the grass looked thicker.
Typical Groomer set up varies with the forward rotation or counter rotation of the groomer. I used John Deere Counter rotating groomers set up at .090 above the ground or 0. I only used the groomers after sand topdressing. Most of the time it was brushing.
Vertical mowing is done more often when the grass is growing fastest. In the middle of the summer it should usually be done lightly once a week. In the spring and fall it may only be done once a month, depending upon necessity. I do not like to use the carbide tipped blades, I recommend the thin spring steel blades like the old Toro blades.
Depth depends upon how worn the blades are. New blades are usually set around 0 or even with the ground. Worn blades are set anywhere between 0 and – .075 below 0 or the ground. It’s a visual adjustment.
One thing that is an absolute is you do not need to heavy vertical mow any ultradwarf. It does not recover well from heavy vertical mowing. If you do it right, light frequent vertical mowing is the way to go and this has been Proven at more than one location.
The most important cultural practice we do to greens. Again, frequency is determined by the rate of growth. Faster growth = more topdressing. The topdressing frequency recommendation is once a week light topdressing in the summer and less often in the spring and fall. Again these frequencies are best based on experience. The sand quality and particle size is very important. Most everyone uses a sand that is too small!!! People have the idea that smaller is better and long term it can get you in trouble and this has been proven. The 2 best topdressing sands that I ever used were both within the USGA recommendations for greens. The real key is to not have any particles larger than 1mm in diameter in the sand and to keep the very fines to below 5% if possible. There is much more to this, as I could write 3 pages on the size of topdressing sand and I will do this later. The sand does not have to be dry, if you have the right spreader. In fact I prefer a little moisture to the sand to hold down the sand dust. Silicosis of the lungs is a real danger and I don’t like my employees to breathe any more of the silica than they have to.
For growing in a green from sprigs, granular fertility is best. No contest in my opinion. Using liquids to try and grow in a green usually causes trouble. I like a pound of N granular ( preferably soluble N source) every 5 to 7 days. Once the green is grown in you should back off the N. When fertilizing a green you should always base your source of Fertilizer off of your soil test. Some greens will need different elements than others and one size does not fit all. I have managed Bermuda greens for 45 years and I have primarily used Granular fertility (70%) over Liquid fertility (30%). Liquid is used primarily for a quick fix (like makeup on a lady) and the granular is used for the foundation of the plant. Plants evolved taking fertility up through the root system for millions of years before man was on the planet. When I moved to Texas, Escondido golf course was using all liquid fertility wall to wall. It looked terrible. We switched to granular and it was amazing in the improvement of the course. The members were very impressed.
Some of the granular products I use are Potassium Nitrate, Anderson Contec DG, and some organics like Nature Safe and Sustain. Ideally, fertility should be applied as needed and not on a strict schedule. Only apply enough N to keep the proper canopy density and if you are thick enough do not apply N fertility. If you have only one small thin spot on your green you should just fertilize the thin spot. If you over apply fertilizer to an ultradwarf green you cannot keep it from becoming too thatchy and puffy, proper N management is a must.
The number of aerifications in a growing season has always been a matter of varied opinion. Some courses do as many as 3 in a season and some do as little as 1. Personally I was always able to get by with one basic core aerification using 3/8 inch hollow tines (side eject ) and 1 supplemental deep aerification using a DryJect, or an Air 2-G2. A deep solid pencil tine with a Verti drain would work also. The deep tine would come in about May 1 and the core aerification would come right after the 4th of July. It is important to get at least one deep aerification per year to prevent the 4 inch cultivation pan that occurs when you use the same depth repeatedly. I would not aerify later than the first week in August on greens as recovery can be tricky later in the summer. The key to keeping your thatch production low is watching the amount of Nitrogen, Topdressing frequency and light frequent Vertical Mowing during the growing months. If you choose to use a DryJect always run it on the closest spacing as the normal setting is too far apart. When injecting materials with the DryJect, you will get a small hump around the injection site. Always roll these back out to prevent scalping when you return to mowing your greens.
When using the Toro Pro Core, I like to never use bigger than ½ tines on Ultradwarf greens. I much rather have smaller holes closer together than bigger holes spread farther apart. One way to get the holes closer together is to change the foot(or Block) on the Pro Core. I like the 6 tine block over the 5 tine block because it moves the tines closer together. I always run the machine on the 1.5 speed to get the desired closeness. Keep in mind that if you change the block to a 6 tine, you will also have to change your Shroud (Turf Guard). When running the Pro Core on the 1.5 speed it produces a better hole.
Video Maintenance Guide
The Lingle System for Ultradwarf Bermudagrass Management — presented by Rodney Lingle, CGCS, and hosted by the Golf Course Superintendents Association of America.

Used by permission of GCSAA
